

DCA Trading Bot in Julia and Python
As you may already know at this point, Ycash is my cryptocurrency of choice. One of the big difficulties for me has been, “What is a good…

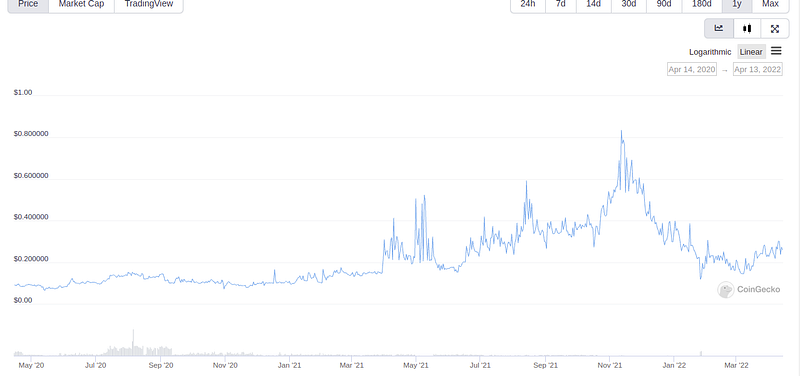
As you may already know at this point, Ycash is my cryptocurrency of choice. One of the big difficulties for me has been, “What is a good price for YEC?”. In the two years since I mined my first coin, the price has been pretty much all over the place.
To combat volatility like this, many people use the DCA (Dollar Cost Averaging) strategy and that’s what I’m going to do today. For starters, I need several things: an exchange account, BTC, python3, pip, and Julia. The exchange I’m going to use is called SouthXchange, there are several 3rd party APIs available for connecting and this is going to make the project much easier. Make sure you add some BTC to your account before running either bot, with an empty balance, our bots will crash (We’ll address this in another article). Next up I need python3 and Julia. I don’t need the newest version of python, Ubuntu’s default will work just fine. Entering “python3” in the terminal starts python and tells me which version I have.

3.8 will be sufficient for what I need. Next I’m going to need to access to the SouthXchange API. Github user, alimogh, has provided that for us here https://github.com/alimogh/Southxchange. This makes it very easy to interact with the exchange from our command line.


Next up, we install Julia https://julialang.org/downloads/. Grab the latest stable release and follow the instructions for your specific OS.
Part 1: The Python Bot
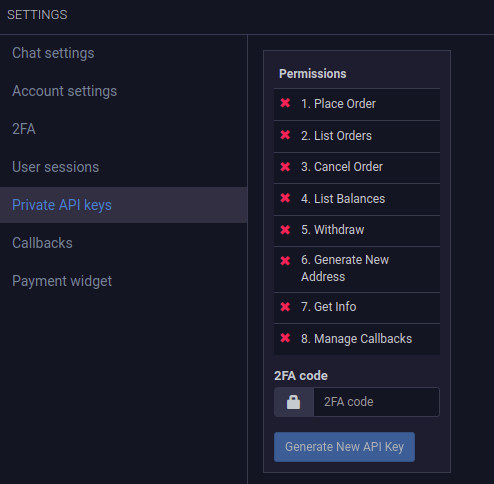
So first off we’ll start the python bot in our text editor by creating a file called “bot.py” and we’ll add some code. Nothing much, just our basic dependencies and our API keys for the exchange. You can generate these by logging in and clicking the settings cogwheel and selecting “ Private API Keys”.

Next, we’ll add a few more lines.

This will save us a bit of typing later on in the script. Now to add our strategy. This is going to be a very simple one, buy one YEC, wait an hour and buy another YEC.
We’ll start by testing the code we have thus far to make sure it works. Let’s add another line to check our balances.

I run the file and…

Success!!!
Next it’s time to add the buying code.

Run the code…

We get an error. This is because we are making too many requests at the same time. Let’s tell our bot to be patient and take a power nap between requests.
Run it…

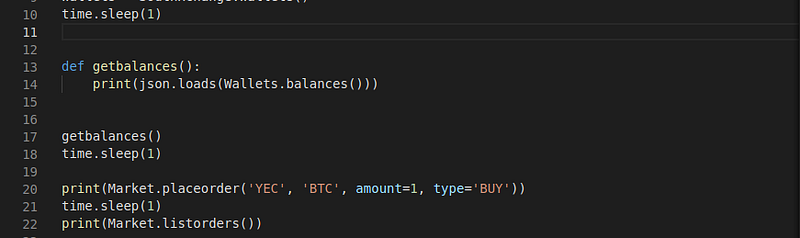
The code runs, but we have another issue. As you can see in the first JSON string, it’s getting our balance, but if you look at the empty brackets near the bottom, we should have orders listed here, but there are no orders. We need to add a price for our orders. For this, we are going make a few changes to our buying code at the bottom.

This picture is after a few test runs, but as you can see, our YEC balance is now higher.

Our buying function is now working. Now time to put this thing on an infinite loop and space the buys apart by an hour. Lets replace “buy()” at the bottom with…

Part 2: The Julia Bot
Time to create a new file. Let’s call this one “bot.jl”. We’ll start out with a few lines of code…

So in Julia, imports are done slightly differently. First we import the package manager, then we download dependencies by using a function. Once our packages are installed, we can declare them with the keyword “using”. Next because our API is written in python, we need to use PyCall. This is an incredibly nifty little tool… well, not little by any means but you get the idea.

Look familiar? So there are a few small differences to pay attention to here. First is the use of the “pyimport()” function. As you probably guessed, pyimport allows us to call python functions. The next difference you should notice, the use of double quotes. In Julia, all strings are done in double quotes. Time to add a couple functions just to show balances and prices to let us know that our code is working.
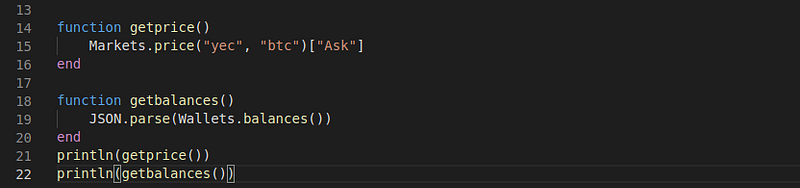
Notice the differences in how functions are declared. We use the keyword “function” to declare them. Instead of adding a “:”, we simply start a new line to begin the body of the function. We then close the function with the keyword “end”.
Run it and you should get something similar to this
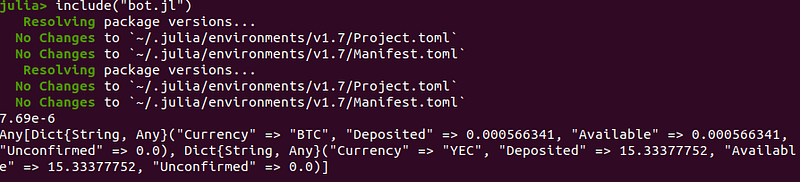
On the first run, you should notice that startup is slow, this is because our program is compiling as it runs through the script.
After your initial run, this should really never take very long again. As the script runs, because of those “Pkg.add()” functions, it’s going to automatically update every time you run the script. Down the road, this will be convenient because it will keep the load light at compile time. If you don’t want to sit through this, after the initial run, you could get rid of the “Pkg.add()” statements, but I’m going to leave them in. I like auto updates. Now let’s add our buying code.

Run it and…

Our deposited “YEC” balance is higher. We now have a functional bot. That’s it for today, you can find the full source code for our new bots here.